Well I’m halfway there! The little nugget is unofficially 6.5 inches and 10.5 ounces. This is what I know so far about my constant companion:
He/she is a squirmer! We had our ultra sound last week and while the nugget was very cooperative, when the tech tried to get a picture of the foot, Nugget would not stay still long enough so the picture didn’t turn out.
He/she is also stubborn! I have been feeling the nugget a lot lately and I’ve noticed that the jabs and kicks are stronger than they were in the beginning. For about a week now at least I’ve made Brian put his hand on my belly in hopes to feel the nugget. But nothing! The nugget stops moving! I’ve noticed that Nugget is especially active after I eat candy or dessert and even last night after my ice cream cone, the nugget was laying low and avoiding high fiving his papa. Oh well, I’m sure Brian will be feeling this too before long.
Other than that we are working on the baby registry and still debating names. With only 4.5 months to go, I think time will really start to fly by. Time to get ready!
Thursday, July 28, 2011
Thursday, June 23, 2011
Eating for Two
Well here I am. I know you've been wondering what's been going on. Here's the truth...for the last 2 months food in general has disgusted me. I couldn't even look at my own blog because that last post about the steak wrap would make me want to throw up. It's sad, but true. I am slowly coming out of my food nausea where soon I should be able to think more about food and hopefully get back into experimenting with recipes. For awhile we might focus on baking. We'll see.
The truth is morning sickness is not fun. It makes you do crazy things, like eat cereal for dinner.
But! I am now 15 weeks pregnant and have most (but not all) of the nausea behind me. Last week was the first week in a long time that I was able to meal plan without gagging. There's still some foods out there that make my stomach turn (Asian cuisine in general for some reason), but for the most part I can get back to more varied dinners which don't include cereal.
So, I'll try to keep this blog updated. Although I'm sure it'll become more about being pregnant than about cooking. I can't help it, that's just where I am in life.
Biggest disadvantage to being pregnant - not being able to eat cookie dough. Last month I made chocolate chip and sugar cookies and all I wanted to do was stick my face into the large bowl of dough. This is illegal in the pregnancy world though. I refrained. I mustered all the will power that exists and managed to resist. But it was difficult.
Biggest advantage - eating for two! Bring on the food!
Tuesday, April 12, 2011
Spiced Steak Wrap
One day I went on a hunt for steak recipes. We don’t eat steaks very often and when we do, we grill them. I decided that I needed a steak recipe or two in my repertoire – one that I wouldn’t have to rely on the grill for. I found this one and I tried it. I tried to buy the 5-spice seasoning, but failed (I only looked at Wal-mart though) so instead I just used a steak grill seasoning.
 The end result was a delicious steak wrap! A good find indeed!
 Here's the recipe:
Serves 4
Ingredients
12 oz beef round steak
2 c packaged shredded cabbage with carrot (coleslaw mix)
1/4 c red/green pepper cut into thin bite-size strips
1/4 c julienned carrot
1/4 c fresh chives
2 T red wine vinegar
1/2 t toasted sesame seeds
1/2 t EVOO (or use sesame oil in place of EVOO and seeds)
1/2 t five spice powder (I actually used grill seasoning since I couldn't find this)
1/4 t salt
1/4 c sour cream
4 8-in flour tortillas
Method
In a medium bowl combine oil, seeds and vinegar. Add coleslaw mix, peppers, carrot and chives. Toss to combine. Set aside.
Trim fat from steak. Thinly slice steak across the grain into 1/4-inch thick strips. Sprinkle steak with seasoning and salt. Preheat skillet over medium-high heat. Add steak strips. Stir-fry for 3 to 4 minutes or until brown.
To assemble, spread 1 T of sour cream down the center of each tortilla. Top with steak strips. Spoon coleslaw mixture over steak. Fold in sides of tortillas to make a wrap.
Monday, April 4, 2011
Fondue
Happy Anniversary! Brian and I have been married exactly two years as of today. Two whole years! In those two years, we have adopted exactly 1 dog, captured numerous rogue lizards in our house, and bought a boat. Seems like a very successful (and productive) two years to me.
We semi-celebrated last night. Last night we had a special dinner. We will continue the party tonight with gift exchanges and a brief lighting of the unity candle. You’re only concerned with dinner, I know. I like food too.
Last night I made fondue. Fondue reminded us of our honeymoon where we spent some time in Amsterdam. While there, we happened upon cheese heaven. We had a fondue dinner and it was ridiculously rich and filling. I like to say that we were defeated by the cheese. I mean, look at that!
This is the second time I made fondue. It’s easy. You should try it. The fondue pot is totally optional. Here’s the road map to cheese heaven:
Cheddar and Beer Fondue
Serves 4 (Or serves one Brian and one Krista with a little left over).
Ingredients
1 sack shredded sharp cheddar cheese
1/4-1/3 pound Gruyère cheese, shredded (4-6 ounces)
1 rounded tablespoon all-purpose flour
1 cup German lager beer (I actually used Stella)
2 tablespoons spicy brown mustard
A few drops of hot sauce
A few drops of Worcestershire sauce
For serving:
broccoli
bread (like a baguette or Italian loaf of whatever looks good that day), cubed
Road Map:
Combine cheeses in a bowl with flour. Add beer to a small pot and bring up to a bubble over medium heat. Reduce the heat to simmer and add cheese in handfuls. Stir constantly, melting the cheese in batches. Stir in a figure-eight pattern with wooden spoon. When the cheese has been incorporated fully, stir in the mustard, hot sauce and Worcestershire sauce. Transfer fondue to warm small crockpot (or a fondue pot if you are fancy enough to have one).
In a pot, bring 2 water to a boil and blanch the broccoli for 2-3 minutes, then drain.
Smoother the bread and broccoli in the cheese and enjoy. Do not let the cheese defeat you!
 |
| Brand new Stella - May 2009 - she had so much energy that the only time we got a decent picture was when she slept. |
 |
| April 2009 - Ready to kneal to the cheese in defeat |
This is the second time I made fondue. It’s easy. You should try it. The fondue pot is totally optional. Here’s the road map to cheese heaven:
 |
| Brian not ready to admit defeat, but he would give in not much later |
Cheddar and Beer Fondue
Serves 4 (Or serves one Brian and one Krista with a little left over).
Ingredients
1 sack shredded sharp cheddar cheese
1/4-1/3 pound Gruyère cheese, shredded (4-6 ounces)
1 rounded tablespoon all-purpose flour
1 cup German lager beer (I actually used Stella)
2 tablespoons spicy brown mustard
A few drops of hot sauce
A few drops of Worcestershire sauce
For serving:
broccoli
bread (like a baguette or Italian loaf of whatever looks good that day), cubed
Road Map:
Combine cheeses in a bowl with flour. Add beer to a small pot and bring up to a bubble over medium heat. Reduce the heat to simmer and add cheese in handfuls. Stir constantly, melting the cheese in batches. Stir in a figure-eight pattern with wooden spoon. When the cheese has been incorporated fully, stir in the mustard, hot sauce and Worcestershire sauce. Transfer fondue to warm small crockpot (or a fondue pot if you are fancy enough to have one).
In a pot, bring 2 water to a boil and blanch the broccoli for 2-3 minutes, then drain.
Smoother the bread and broccoli in the cheese and enjoy. Do not let the cheese defeat you!
Saturday, April 2, 2011
Turn Around Hiatus
Before you start yelling at me for taking 2 weeks to post something new, you have to let me plead my case.
I am currently working turn around. This started right after my delicious mint chocolate cupcake post. It’s not my fault, it’s a job. They send me a check regularly and as such I am obliged to show up when told to do so. Because of that I have been working lots of extra hours these last two weeks. This is bad for the blog for exactly 2 reasons.
1. During times like these, I have little interest in eating healthy or taking time to cook. So I haven’t made anything new. Come on, we’re lucky that I’m still kinda cooking at all during this time.
2. When I do finally get home, I crash on the couch, and I can’t even find enough energy to get up and sit at the computer even if I did have something new to blog about.
Now, for those of you that don’t know what it means to work a turn around (TA from here on out). Let me break it down for you.
TA – is when a plant/operating unit shuts down all its equipment, takes it apart, cleans it, improves it, modifies it, then puts it back together. Thankfully these happen infrequently (like every 5 years). The idea is that when the plant starts up again everything will be perfect since everything’s clean and peachy and fantastic. But in reality this isn’t the case. But that’s another story for another time.
What a TA means for me as an engineer – I get to run around (literally) and take care of a billion little issues that come up. I also get to do a lot of my normal type work, but I have to work it at an accelerated pace because my work can’t slow down the progress of the TA. (You do that and you make enemies for life). So in TA mode I have to do something in like an hour when in normal mode it could take me a week. The good thing about all this is that it makes the days go fast which means a TA seems to fly by. Sometimes though, sometimes I wonder about people. This is an example of an issue I took care of once:
I walk up to a group of guys who are working on a project
Me: What’s going on?
Lead guy: The new bolts won’t fit because they’re too long, so can we use these other bolts.
Me: Do these other bolts fit?
Lead guy: Yes.
Me: Then yes, use the bolts that fit.
Seriously – true story. I’m a problem solver I am!
All this running around and solving problems takes its toll. This is what happens to me during a TA. My knees and feet start hurting (please keep in mind that normally-not during TA-I spend a majority of my time at my desk). I become so physically drained that once I sit down it takes an enormous amount of effort to get back up – even when it means going home. On top of this, I actually become mentally exhausted as well. Not because of issues like the bolts above, but a lot of times I do have to think critically to help with something. On top of this I work extra days which means I have no weekend to recover and rejuvenate. Tough stuff.
All of this exhaustion results in no new recipes, barely making dinner (we had frozen pizza and breakfast for dinner this week) and just being gosh darn tired. I also forget a lot of stuff and talk to myself in an almost insane manner.
But the end is in sight! I’m scheduled to be back to normal by Monday and I even get tomorrow off! Yay. This week I do plan on making goodness. So there should be one or two treats in store. Thanks for bearing with me!
Sunday, March 20, 2011
Happy St Patrick's Day
I know I'm a few days late, but I made, err, actually iced these cupcakes on St Patty's day so I thought I'd make them green! Since I was making them green, I thought well why don't I make them minty too. These are inspired by my friend Jaclyn's delicious Peppermint Mocha Cupcakes that she shared with us at Christmas time.
 The cupcake is the same chocolate cake recipe that I used for Brian's birthday cupcakes. Find the recipe here! Then I tried to make a buttercream mint icing. I think I was fairly successful with it, although I made quite the mess in the process (I had butter everywhere!). I think the next time I make this icing, I'm going to add more sugar and probably beat the butter for longer in hopes to get the icing creamier/fluffier.
Mint Icing:
to frost ~15 cupcakes (half the cake recipe)
13 T butter, softened (This is almost 1.5 sticks...I just happened to have 7/8 of a stick lying around so I used that + half a stick)
~1 c powdered sugar (didn't measure this just kept adding until it didn't taste too buttery)
1 t peppermint extract
dash of milk
green food coloring
 Making this icing I realized that turning food different colors is fun! I am definitely going to be looking for more desserts that I can use food coloring in. I think I also want to try a mint chocolate chip cupcake. I'll probably hold off on that for awhile though because as you can tell from the posts recently I've been doing a lot of baking and not enough cooking. I haven't done a new dinner recipe in a week or two now. The main reason was because I had a sinus infection and nothing sounded good and all I wanted to do was hang out on the couch. I think I'm finally shaking that so let the newness begin!

Mint Icing:
to frost ~15 cupcakes (half the cake recipe)
13 T butter, softened (This is almost 1.5 sticks...I just happened to have 7/8 of a stick lying around so I used that + half a stick)
~1 c powdered sugar (didn't measure this just kept adding until it didn't taste too buttery)
1 t peppermint extract
dash of milk
green food coloring

Chocolate Chip Peanut Butter Banana Bread
As I mentioned in a recent post, I've recently discovered the blogs on RR's website. I found this recipe recipe for a chocolate chip peanut butter banana bread. Yum. I made this the other day and it turned out really well. I can't taste the peanut butter very much, but Brian thought he could. Anyway, it's delicious.
The recipe can be found here.


The recipe can be found here.


Sunday, March 13, 2011
Monte Cristo
As I was looking through my posts, I realized that I never published this one. I guess it's a 3 for 1 type of Sunday!!

Even though I have been slacking blogging, I have NOT been slacking on the cooking part! I’ve still been trying new things on a weekly basis, but I have failed taking pictures and posting about it.
Last night was new recipe night and I was once again inspired to take a picture! I attempted making a Monte Cristo sandwich. The recipe I used called for griddling the sandwich instead of frying which is definitely healthier. I’m tempted to try the fried version though the next time I make this. Next time I also plan to fry the bacon instead of bake it. Baking it didn’t make the bacon done enough for my preference. I also couldn’t find white cheddar so I ended up using Swiss which was delicious. I did drizzle the sandwiches with syrup (after the picture, oops!), but that just turned into a messy dinner - so next time we might be dipping our sandwiches instead. This was an easy recipe and quick except for the 20 minutes in the oven for the bacon which I plan on changing the next time. Enjoy!
Here’s the recipe:
ABC Monte Cristo
Serves 4
Ingredients
12 slices good-quality bacon
8 slices good-quality peasant or round-loaf french bread
1/2-3/4 pound extra-sharp white cheddar cheese
2 golden delicious or gala apples, cored and very thinly sliced
3 large eggs
1/2 cup whole milk or half-and-half (I used skim milk)
A little freshly grated nutmeg
Butter, for greasing
Warm maple syrup, for drizzling
Method
Bake the bacon on a broiler pan or a rack set over a baking sheet at 375°F until just crisp, about 20 minutes. Arrange 4 slices of bread with some cheese and the apples on top. Beat the eggs with the milk (or half-and-half) and a little nutmeg. Heat a large griddle pan over medium heat. When ready, arrange 3 slices of bacon on each sandwich and top with a little more cheese and 4 more slices of bread. Coat each sandwich in the egg batter. Grease the griddle with butter and griddle the sandwiches until deep golden on each side and the cheese has melted. Halve the sandwiches and drizzle with a little warm syrup.
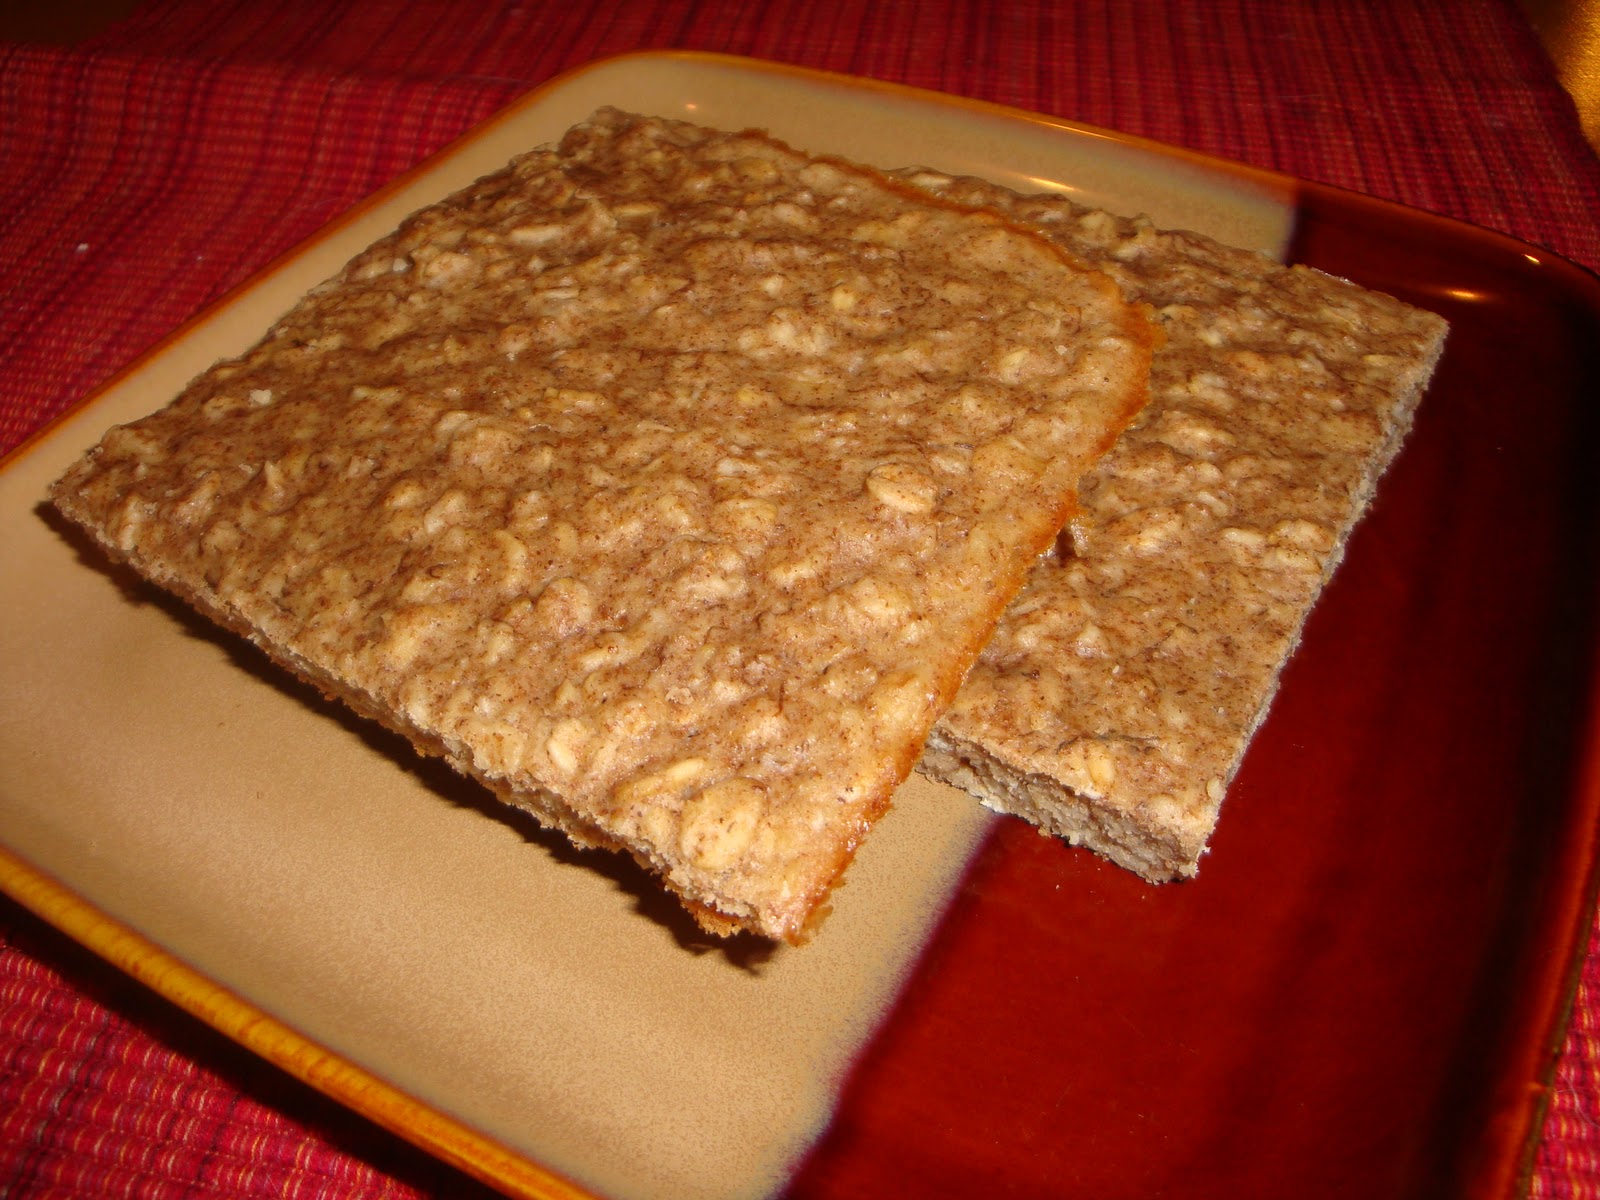
Banana Oatmeal Squares
The first time I made this recipe, it was a failure. Even though the failure was no fault of mine (I remembered all the ingredients, followed the direction to a tee!), I decided to try it again.
To me these oatmeal squares are a perfect breakfast. I'm not usually hungry in the morning so these are ideal because it's not too much food, but at the same time they seem to keep me full all morning. The first time I made these I used an 8x8 pan just like I was instructed. The recipe said to cook them 20-25 minutes or until a toothpick is clean. Well I had these suckers in for 45 minutes and the toothpick was still gummy. I thought clearly this is long enough and they will set up more when the cool. WRONG! I still ate them, but it was more like eating a thick oatmeal then a breakfast bar. I like oatmeal so this wasn't horrible, but I don't recommend it.
Last Sunday I tried these suckers again. I modified the recipe by using peanut butter instead of butter. (I can't taste the peanut butter in the final product though so next time I'm going to use a little more or just stick with butter, although peanut butter seems healthier to me). I also used a 9x13 pan. Everything else was the same. This time they cooked up nicely in about 30 minutes. The bars are quite thin, but at least the texture is right.
Disclaimer: These are not sweet. In fact they are quite bland. Again, I like oatmeal. I eat plain oatmeal and I don't add anything to it (no sugar, fruit, milk, nothing). I enjoy oatmeal this way. If you are the type to load up your oatmeal with sugar, then this recipe might not be for you. I don't think you have to love oatmeal to enjoy these bars though. I also think you can top these with fruit, honey, jelly to satisfy your sugar need.
Oh I think it's important to note where I found this recipe. I recently discovered the blogs on Rachael Ray's website. There's quite a few that I enjoy checking in on and it seems like a fresh place to find some more recipes to try. This recipe is from this blog.


Because I'm not too hungry in the morning I usually eat by number of calories instead of what my tummy is telling me. So I added up all the calories that went into this sucker. 1000 calories total...for the whole 9x13 pan. I divide this into 6 for a whopping 166 calories per bar and pair one bar with my instant breakfast drink for the perfect breakfast!
makes ~6 bars (1 9x13 pan)
Ingredients
1 1/2 c oatmeal
1/2 c wheat flour
1/2 t baking soda
1/2 t salt
1 t cinnamon
1 L ripe banana, mashed
2 T peanut butter
1 egg, beaten
1 c milk
Method
Preheat oven to 350F. Grease 9x13 pan.
Mix all ingredients together in a large bowl. Pour mixture into pan. Bake 25-30 minutes or until a toothpick inserted in center of pan comes out clean (important!). Cool before cutting. Refrigerate. These last about a week in the refrigerator.
To me these oatmeal squares are a perfect breakfast. I'm not usually hungry in the morning so these are ideal because it's not too much food, but at the same time they seem to keep me full all morning. The first time I made these I used an 8x8 pan just like I was instructed. The recipe said to cook them 20-25 minutes or until a toothpick is clean. Well I had these suckers in for 45 minutes and the toothpick was still gummy. I thought clearly this is long enough and they will set up more when the cool. WRONG! I still ate them, but it was more like eating a thick oatmeal then a breakfast bar. I like oatmeal so this wasn't horrible, but I don't recommend it.
Last Sunday I tried these suckers again. I modified the recipe by using peanut butter instead of butter. (I can't taste the peanut butter in the final product though so next time I'm going to use a little more or just stick with butter, although peanut butter seems healthier to me). I also used a 9x13 pan. Everything else was the same. This time they cooked up nicely in about 30 minutes. The bars are quite thin, but at least the texture is right.
Disclaimer: These are not sweet. In fact they are quite bland. Again, I like oatmeal. I eat plain oatmeal and I don't add anything to it (no sugar, fruit, milk, nothing). I enjoy oatmeal this way. If you are the type to load up your oatmeal with sugar, then this recipe might not be for you. I don't think you have to love oatmeal to enjoy these bars though. I also think you can top these with fruit, honey, jelly to satisfy your sugar need.
Oh I think it's important to note where I found this recipe. I recently discovered the blogs on Rachael Ray's website. There's quite a few that I enjoy checking in on and it seems like a fresh place to find some more recipes to try. This recipe is from this blog.

Because I'm not too hungry in the morning I usually eat by number of calories instead of what my tummy is telling me. So I added up all the calories that went into this sucker. 1000 calories total...for the whole 9x13 pan. I divide this into 6 for a whopping 166 calories per bar and pair one bar with my instant breakfast drink for the perfect breakfast!
makes ~6 bars (1 9x13 pan)
Ingredients
1 1/2 c oatmeal
1/2 c wheat flour
1/2 t baking soda
1/2 t salt
1 t cinnamon
1 L ripe banana, mashed
2 T peanut butter
1 egg, beaten
1 c milk
Method
Preheat oven to 350F. Grease 9x13 pan.
Mix all ingredients together in a large bowl. Pour mixture into pan. Bake 25-30 minutes or until a toothpick inserted in center of pan comes out clean (important!). Cool before cutting. Refrigerate. These last about a week in the refrigerator.
Open-face Salmon Burgers with Honey Mustard
This week's new recipe was Open-face Salmon Burgers. In my to try pile I have quite a few seafood recipes. My goal has been to eat fish at least once a week. I have a salmon cakes recipe that regularly appears on our meal calender, but that is about it for salmon so I was specifically looking for a new recipe with salmon.


This turned out really well. Next time I might think of using canned salmon instead of salmon fillets. I think canned might be cheaper and it's something that seems easier. Although, the salmon fillets were really most and binded together well to make the burger so I might stick with the fillets after all. I have been successful with frozen seafood. Not too long ago I found a brand that I really like. It might just be the general Walmart brand, but it comes in a red pouch and the fish are vacuum sealed in. I first tried this brand when I bought mussels. Next I tried the tilapia and most recently for this recipe I purchased the salmon. All of these have tasted fantastic. And with the tilapia I preferred the frozen over the fresh, because the fresh fish that I got smelled and tasted a little fishy. I have not experienced that with the frozen variety though. In general, I am not a big seafood eater. I like eating some fish mainly because I know it's good for me. I like tuna and salmon (especially raw in the form of sushi!), but white fish has never been my thing. With all that being said, I am starting to really enjoy tilapia too and I am considering branching out again to try a new fish. Maybe you have a recommendation of one that I could try next???
Ok, on to the recipe:
Serves 2
Ingredients
about 3 T dijon mustard (or spicy brown which is what I used)
about 1 T honey
2 salmon fillets, skinless
salt and pepper
2 T fresh chives (I just realized that I forgot this - oops!)
1 T Old Bay Seasoning (not used, I didn't even use any seasoning besides S&P, I think there's enough taste from the mustard)
1 t grated lemon zest (I used a few drops of lemon juice instead)
EVOO
butter, for spreading
1 English muffin, split and toasted (or just bread or a bun or whatever)
cucumbers and red onion for topping
Method
In a small bowl, stir together mustard and honey. Using the food processor, pulse salmon to a finely chop. (In an effort to be lazy, I tried to use a fork and break up the fillet, but I was unsuccessful). Place salmon in bowl and season with salt and pepper and old bay and lemon zest. Add the chives, and about 1 T of the honey mustard. Form into 2 large burgers.
Drizzle some EVOO into a large nonstick skillet or griddle. Add the burgers and cook, turning once, over medium-high heat for 6 minutes for medium rare or 10-12 minutes for well done.
Lightly butter the muffins. Top each muffin half with the salmon burger, remaining honey mustard, sliced cucumbers and red onions. Eat these beauties with a knife and fork!
Monday, March 7, 2011
Super Nachos
I found a new favorite: Super Nachos. To me this is a perfect weekend dinner. At first appearance, it doesn't look like it can be good for you, but really I think it's not too bad. The meat is combined with beans, and then you top the nachos with a lot of tasty veggies. Perfect! This meal was pretty easy to put together, the only difficult part was managing the cheese part while getting everything else ready. After making this a few more times though I think it'll become a lot smoother.
 Ingredients
2 servings (shown is 2+)
corn tortilla chips
Beef and Beans Topping:
1 tablespoon extra-virgin olive oil
1/2 pound ground sirloin
1 clove garlic, chopped
1/2 small onion, chopped
1 green chile pepper, seeded and chopped
salt
1 t dark chili powder
1 t ground cumin, half a palmful
1/2 t cayenne pepper sauce, (more for more heat)
1 can black beans, 15 ounces, drained
Cheese Sauce:
1 tablespoons butter
1 tablespoons all-purpose flour
1 cups milk
~1 1/4 c pepper jack cheese, shredded
Method
Arrange a mixture of 2 varieties of corn chips on a very large platter or use your broiler pan as a platter.
Heat a medium nonstick skillet over medium high heat. Add oil, garlic, onion and chile to the pan and saute 2 minutes, then add meat and crumble with wooden spoon. Season meat with salt, chili powder, cumin and cayenne pepper sauce. Cook meat 5 minutes, then stir in beans and reduce heat to low.
In a medium sauce pot, melt butter and add flour to it. Cook flour and butter 1 to 2 minutes over moderate heat, then whisk in milk. When milk comes to a bubble, stir in cheese with a wooden spoon. Remove cheese sauce from the heat.
Pour cheese sauce evenly over the massive spread of chips and top evenly with beef and beans. Serve immediately as is or garnish with your choice of toppings like sour cream, green onions, tomatoes, and avocados.
Saturday, February 26, 2011
Sweet n Sour Chicken
Who needs take out when you can make this meal?! That was exactly what I asked Brian when I set this new recipe in front of him. I made this last week for the first time and it turned out really well. There are a lot of ingredients so it was a little overwhelming making it the first time - I was nervous about omitting an ingredient (which I have been guilty of in the past). This was a great meal and it definitely satisfied my craving for take out Chinese and sweet and sour! Enjoy!

Here's the recipe (a modified Rachael Ray one)
Serves 4
Ingredients:
1 cup of brown rice (or white)
2 scallions, finely chopped
2 T vegetable oil
4 chicken breasts, diced
2 cloves of garlic, finely chopped
1 inch ginger, peeled and grated
2 green bell peppers, seeded and diced
1 L onion, diced
1 can pineapple chunks, reserve the juice
pepper
Sauce:
1 T hot sauce (I use Frank's Red Hot sauce)
Juice of 1 lime
3 T honey
3 T soy sauce
3 T red vinegar
1 can (8 oz) tomato sauce
1 T cornstarch
Method:
Prepare rice according to package directions. Once cooked, stir in scallions.
While rice is cooking, place a large skillet over High heat. Add oil to pan. While oil is heating up, combine hot sauce, lime juice, honey, soy sauce, tomato sauce and cornstarch in a small bowl, stirring to dissolve the cornstarch. Set aside.
When skillet is hot, add chicken and cook until browned. Add garlic, ginger, peppers and onions. Stir fry the meat and veggies for 2 minutes more. Add pineapple and some juice (I did this to help prevent everything from burning). Add in tomato sauce. Stir everything together. Bring to a boil and cook for 1 minute more to thicken sauce.
Season everything with pepper and serve chicken over the scallion rice.
Monday, February 14, 2011
Buffalo Chicken Wrap
Buffalo chicken sandwiches were one of the first things I started cooking. I learned how to make the sauce from one of Rachael Ray’s cookbook. After the sauce, there isn’t much needed in order to make the sandwich. Well, after a recent visit to Cheddar’s, I decided to transform my buffalo chicken sandwich into a wrap. The wrap is definitely less messy and delicious and has taken the place of the sandwich.
Here’s the recipe:
For 2 wraps
Disclaimer: I never measure ingredients when I make this sauce, just eye ball it. Here are my best estimates as to what I use.
Sauce:
1 T butter
1 T flour
1.5 – 2 T hot sauce
Wrap:
8 oz cooked chicken, cubed
~1 cup of coleslaw or cabbage (I’ve been using the pre-made coleslaw mix – not the deli version)
¼ c + shredded cheese
about 6 dill pickle slices
Ranch dressing
For the sauce: melt butter in a small sauce pan over low heat. Add flour and whisk. Add hot sauce, allow sauce to thicken and heat through. If sauce is too thin, add flour. If too thick, add water. When sauce is ready, stir in cooked chicken to coat.
Warm up tortillas in microwave for about 20 seconds (this make the tortilla easier to roll and less likely to tear). Keep ingredients down the center of the tortilla. Top with cheese and coleslaw. Top with coated chicken and pickles. Drizzle Ranch on top. Roll up tortilla. Slice in the middle.
Here’s the result (shown with Parm Potatoes and asparagus)!

Sunday, February 6, 2011
Reese Cupcakes
Today is Brian's birthday! HAPPY BIRTHDAY to my gorgeous husband! In honor of his birthday, I made cupcakes! Baking is not really my thing. It's messy and I hate having temptations around because I have no self control when it comes to chocolate. All that being said, it was amazing making this from stratch (except the Reese cup part). I think in the future I will always try to make things from scratch as opposed from a box. It's a much bigger feeling of self accomplishment and it's not really that difficult!
For this recipe I used a chocolate cake recipe and added a Reese's Cup to each cupcake liner. They turned out delicious, but the bottoms of my cupcakes stuck to the paper liners. I'm not sure if this is because I used paper liners (instead of foil) or if I cooked them just a little too long (22 minutes) and maybe the bottom burnt a little? The rest of the cupcake is fine so I'm leaning toward the paper liners being the culprit.
Here's the cake recipe:
Makes 30 cupcakes or 1 cake
Ingredients
2 c sugar
1 3/4 c all-purpose flour
3/4 c hershey's cocoa
1 1/2 t baking powder
1 1/2 t baking soda
1 t salt
2 eggs
1 c milk
1/2 c vegetable oil
2 t vanilla extract
1 c boiling water
Method
Preheat oven to 350F. Grease and flour two 9-inch round baking pans (if making the cake).
Stir together sugar, flour, cocoa, baking powder, baking soda, and salt in a large bowl. Add eggs, milk, oil and vanilla. Beat on medium speed for 2 minutes. Stir in boiling water (batter will be thin).
Pour batter into prepared pans. Bake 30-35 minutes or until a wooden toothpick inserted in the center comes out clean.
Or for the cupcake version: Put the liners in the pans. Add a reese's cup to each liner. Add batter over the reese cup. And fill about 2/3 full. bake 22-25 minutes. Cool completely. Frost!
Peanut Butter Icing
Ingredients
Peanut butter (I used about 2 c for 1/2 of the above recipe - which really made 20 cupcakes since the reese's cup takes up some room).
dash of milk
dash of vanilla
powdered sugar to desired consistency
Mix peanut butter, vanilla and milk. Add sugar to get desired consistency. I used enough sugar until the peanut better was moldable (and not sticky).
Yum! Here's a picture!


Peanut Orange Carrot Salad
I've been trying to find more veggie sides instead of only focusing on the main course. With this one I hit the jackpot! I am not very fond of carrots for some reason, but I know they are a good souce of vitamins. Well pair them with peanut butter and I will eat them! The second time I made this, I used orange juice instead of juice from a fresh orange - it was an ok substitution, but I think the fresh juice makes a difference.
Here's the recipe:
Serves 4
Ingredients
1/4 c peanut butter
3 T soy sauce
Juice from 1 orange
1 inch piece of ginger, grated
1 lb grated carrots
4 scallions
1/4 c peanuts
Method
Microwave peanut butter about 10 seconds to soften. Add soy sauce, orange juice, and ginger. Whisk. Stir carrots into dressing. Top with scallions and peanuts. Season with salt and pepper to taste.
 Here is the carrot salad paired with Thai Chicken Pizza!
Here's the recipe:
Serves 4
Ingredients
1/4 c peanut butter
3 T soy sauce
Juice from 1 orange
1 inch piece of ginger, grated
1 lb grated carrots
4 scallions
1/4 c peanuts
Method
Microwave peanut butter about 10 seconds to soften. Add soy sauce, orange juice, and ginger. Whisk. Stir carrots into dressing. Top with scallions and peanuts. Season with salt and pepper to taste.

Thai Chicken Pizza
This week my parents moved to Thailand. So in honor of their new adventure, I chose to make Thai Chicken Pizza for my new recipe of the week. This new recipe was a winner! It was super easy - the only complaint I had was that I got tired from cutting the raw chicken. I wanted to cut it super tiny (recipe says diced) so it would cook quickly and also because smaller pieces seemed to make more sense as a pizza topping. If I ever need this to be a super quick dinner then I plan on cooking the chicken ahead of time. Here's the recipe:
Ingredients
1 whole wheat pizza crust (use homemade dough if desired)
1/4 c smooth peanut butter (microwave ~10 seconds to soften and make whisking easier)
3 T water
2 t soy sauce
2 t rice vinegar (I actually used red wine vinegar)
2 t fresh ginger, grated
1 clove garlic, minced
1 t oil
8 oz chicken breast, diced
1 red bell pepper, diced
4 scallions, thinly sliced
2/3 c shredded mozzarella
Method
Preheat oven to 450F. Heat oil in a medium skillet over medium high heat. Add chicken and cook, stirring until cooked through about 5 minutes.
Whisk peanut butter, water, soy sauce, vinegar, ginger and garlic in a medium sized bowl. Reserve about 1 tablespoon of sauce and spread remainder on crust. Add cooked chicken, bell pepper and scallions to reserved peanut buter sauce. Mix to coat. Add to pizza. Top with cheese. Bake 11-13 minutes, until cheese is melted and golden.
And now the picture!

This pizza went really well with a new side I discovered: Peanut Orange Carrot Salad!
Wednesday, February 2, 2011
Chicken and Black Beans
I just realized that I haven't made a 2011 post yet. How lazy of me! I will try to post a few within the next week to make up for the non-existent January posts.
One of my favorite dinners is Chicken and Black Beans. I really like this meal for a few reasons: it's easy to make, it's delicious, and it's easy to modify. I have done this like the recipe says by serving with rice, but I have also omitted the rice and just served it on chips. I have also tried it as a burrito. Once I even used leftovers as toppings for a baked potato. All these different ways were delicious.


Here's the recipe:
Ingredients
3 tablespoons EVOO, divided
4 large cloves garlic, 3 chopped or finely grated, 1 crushed
1 1/2 cups white rice (or tortilla chips or tortillas)
Salt and pepper
3 cups chicken stock, (for the rice)
1 1/2 pounds boneless, skinless chicken thighs or breasts or a combo, cut up into bite-size pieces
1 tablespoon ground cumin (a palmful)
1/2 tablespoon ground coriander (half a palmful)
1 large red onion, thinly sliced
1 red bell pepper, chopped
1 chipotle pepper in adobo sauce, chopped (remove the seeds for less heat)
1 can black beans (15 ounces), drained and rinsed
1/4 cup flat leaf parsley (a couple of handfuls), chopped (I use dry about 1-2 tsp)
4 plum tomatoes, seeded and roughly chopped
1 cup shredded sharp cheddar cheese
Method
Place a medium saucepot over medium-high heat with one turn of the pan of EVOO, about 1 tablespoon. Add the crushed garlic clove and the rice, then add some salt and pepper and stir to coat in the EVOO. Add 3 cups of chicken stock and bring up to a simmer. Cover with a lid and cook until tender, about 18 minutes.
Once you have the rice going, place a large skillet over high heat with two turns of the pan of EVOO, about 2 tablespoons. Add the chicken and season with some salt, pepper, cumin and coriander. Spread the chicken out in an even layer and let it brown up for about 3-4 minutes. Give the chicken a stir, add the onion, garlic, red bell pepper, and chipotle in adobo, stir to combine, then continue to cook for 5 minutes. Add the black beans and simmer for 5 more minutes. Add the parsley, and chopped tomatoes and stir to combine.
Fluff the rice with a fork and remove and discard the garlic clove. Divide the rice between four shallow serving bowls. Top with some of the black beans and chicken mixture, sprinkle with some of the cheddar cheese and serve!
One of my favorite dinners is Chicken and Black Beans. I really like this meal for a few reasons: it's easy to make, it's delicious, and it's easy to modify. I have done this like the recipe says by serving with rice, but I have also omitted the rice and just served it on chips. I have also tried it as a burrito. Once I even used leftovers as toppings for a baked potato. All these different ways were delicious.

Here it is waiting in the skillet.
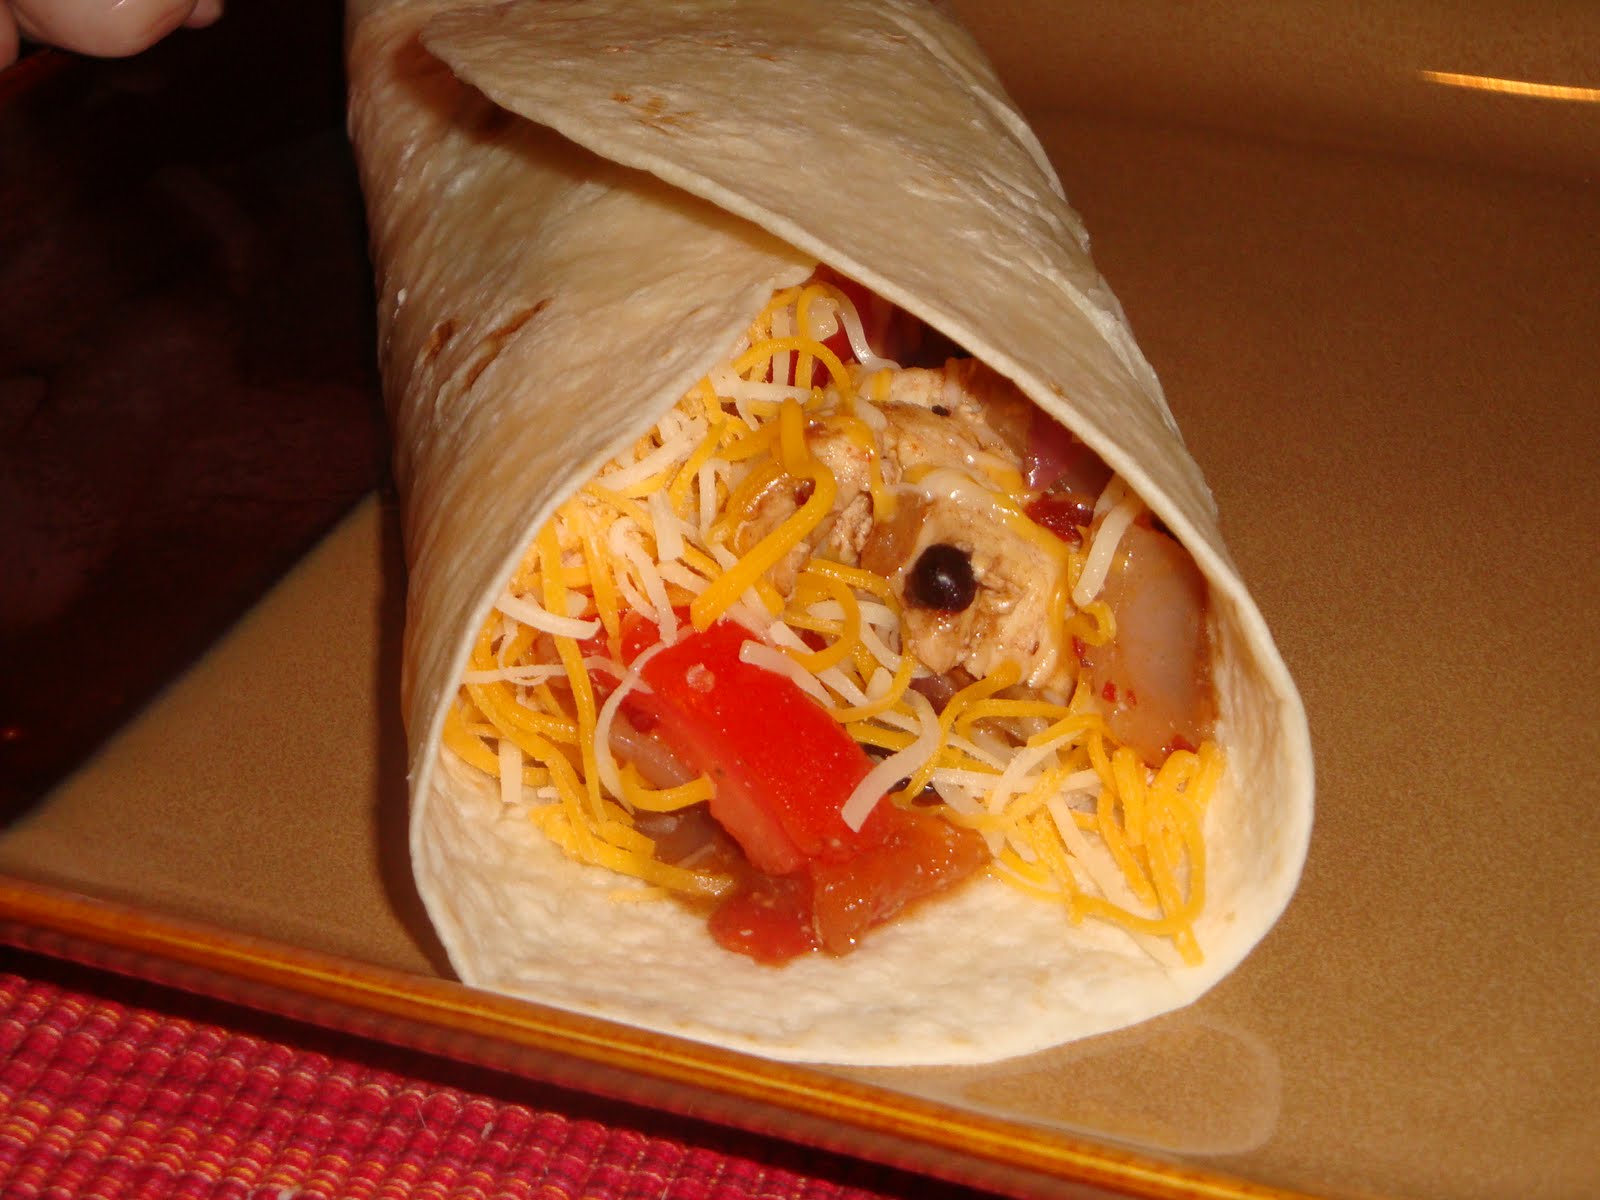
Here it is as a burrito!
Here's the recipe:
Ingredients
3 tablespoons EVOO, divided
4 large cloves garlic, 3 chopped or finely grated, 1 crushed
1 1/2 cups white rice (or tortilla chips or tortillas)
Salt and pepper
3 cups chicken stock, (for the rice)
1 1/2 pounds boneless, skinless chicken thighs or breasts or a combo, cut up into bite-size pieces
1 tablespoon ground cumin (a palmful)
1/2 tablespoon ground coriander (half a palmful)
1 large red onion, thinly sliced
1 red bell pepper, chopped
1 chipotle pepper in adobo sauce, chopped (remove the seeds for less heat)
1 can black beans (15 ounces), drained and rinsed
1/4 cup flat leaf parsley (a couple of handfuls), chopped (I use dry about 1-2 tsp)
4 plum tomatoes, seeded and roughly chopped
1 cup shredded sharp cheddar cheese
Method
Place a medium saucepot over medium-high heat with one turn of the pan of EVOO, about 1 tablespoon. Add the crushed garlic clove and the rice, then add some salt and pepper and stir to coat in the EVOO. Add 3 cups of chicken stock and bring up to a simmer. Cover with a lid and cook until tender, about 18 minutes.
Once you have the rice going, place a large skillet over high heat with two turns of the pan of EVOO, about 2 tablespoons. Add the chicken and season with some salt, pepper, cumin and coriander. Spread the chicken out in an even layer and let it brown up for about 3-4 minutes. Give the chicken a stir, add the onion, garlic, red bell pepper, and chipotle in adobo, stir to combine, then continue to cook for 5 minutes. Add the black beans and simmer for 5 more minutes. Add the parsley, and chopped tomatoes and stir to combine.
Fluff the rice with a fork and remove and discard the garlic clove. Divide the rice between four shallow serving bowls. Top with some of the black beans and chicken mixture, sprinkle with some of the cheddar cheese and serve!
Subscribe to:
Posts (Atom)